DISCOVER BEACON
Hard-wired power, active gateway, with Bluetooth
SETUP INSTRUCTIONS
Step 1 - Connect Battery
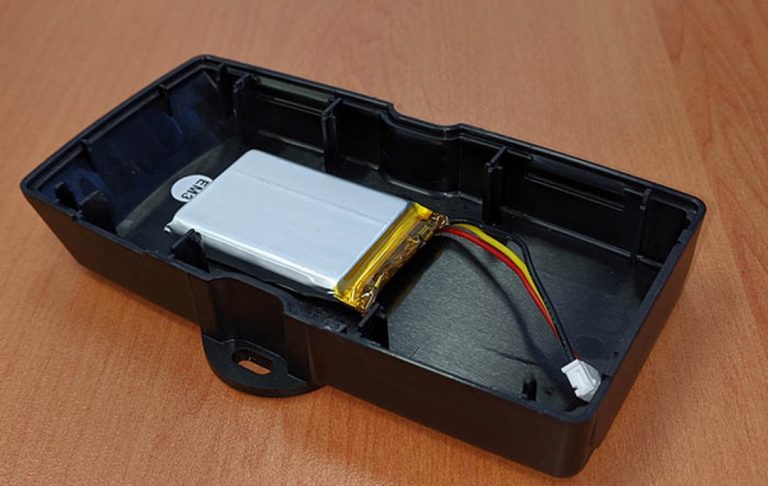
The battery should be fixed to the lower half of the housing and is a LiPO 1100MHz battery pack. Do not move it. The battery plug is a three-way connector on the underside of the PCB.
- Tilt the PCB, lifting it out of the housing. Raise the edge opposite to the SIM card. Take care to avoid touching the GPS antenna.
- Insert the battery plug into the connector. It should only be possible in one orientation.
- The LED on the board will light up and flash if the battery has sufficient charge. Batteries are supplied fully charged.
- Place the PCB back into the housing.
Step 2 - Determine location
The Discover beacon will need to be placed in a location where it will not be tampered with and is relatively safe from the elements. Typical locations are under the dashboard or in the headliner.
- We recommend not putting the beacon in any external location such as the engine compartment.
- We recommend wiring the beacon to a fuse box. Keep this in mind when choosing a location. Wire length from the beacon can be extended if needed.
- Make note of the location. You may need to find it in the future. We recommend in the Notes section for the beacon for future reference.
Step 3 - Wiring Beacon
Once the location is determined you will need to wire the beacon to the fuse box. You will need a power source that is always powered (Red Wire), a source that is connected to ignition power (White Wire) and a ground (Black Wire).
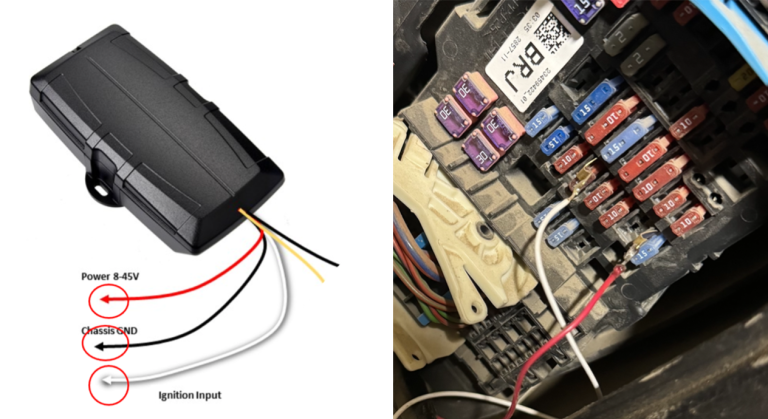
We recommend using a Blade Fuse Tap to connect powered wires to the fuse box with a female connector on the wire from the beacon. Ground wires can generally be attached to any bare metal in the vehicle.